
On Target Weaning Baby Led Feeding
December 13, 2019
Are You Using Your Invisible Suit of Armor?
March 12, 2020

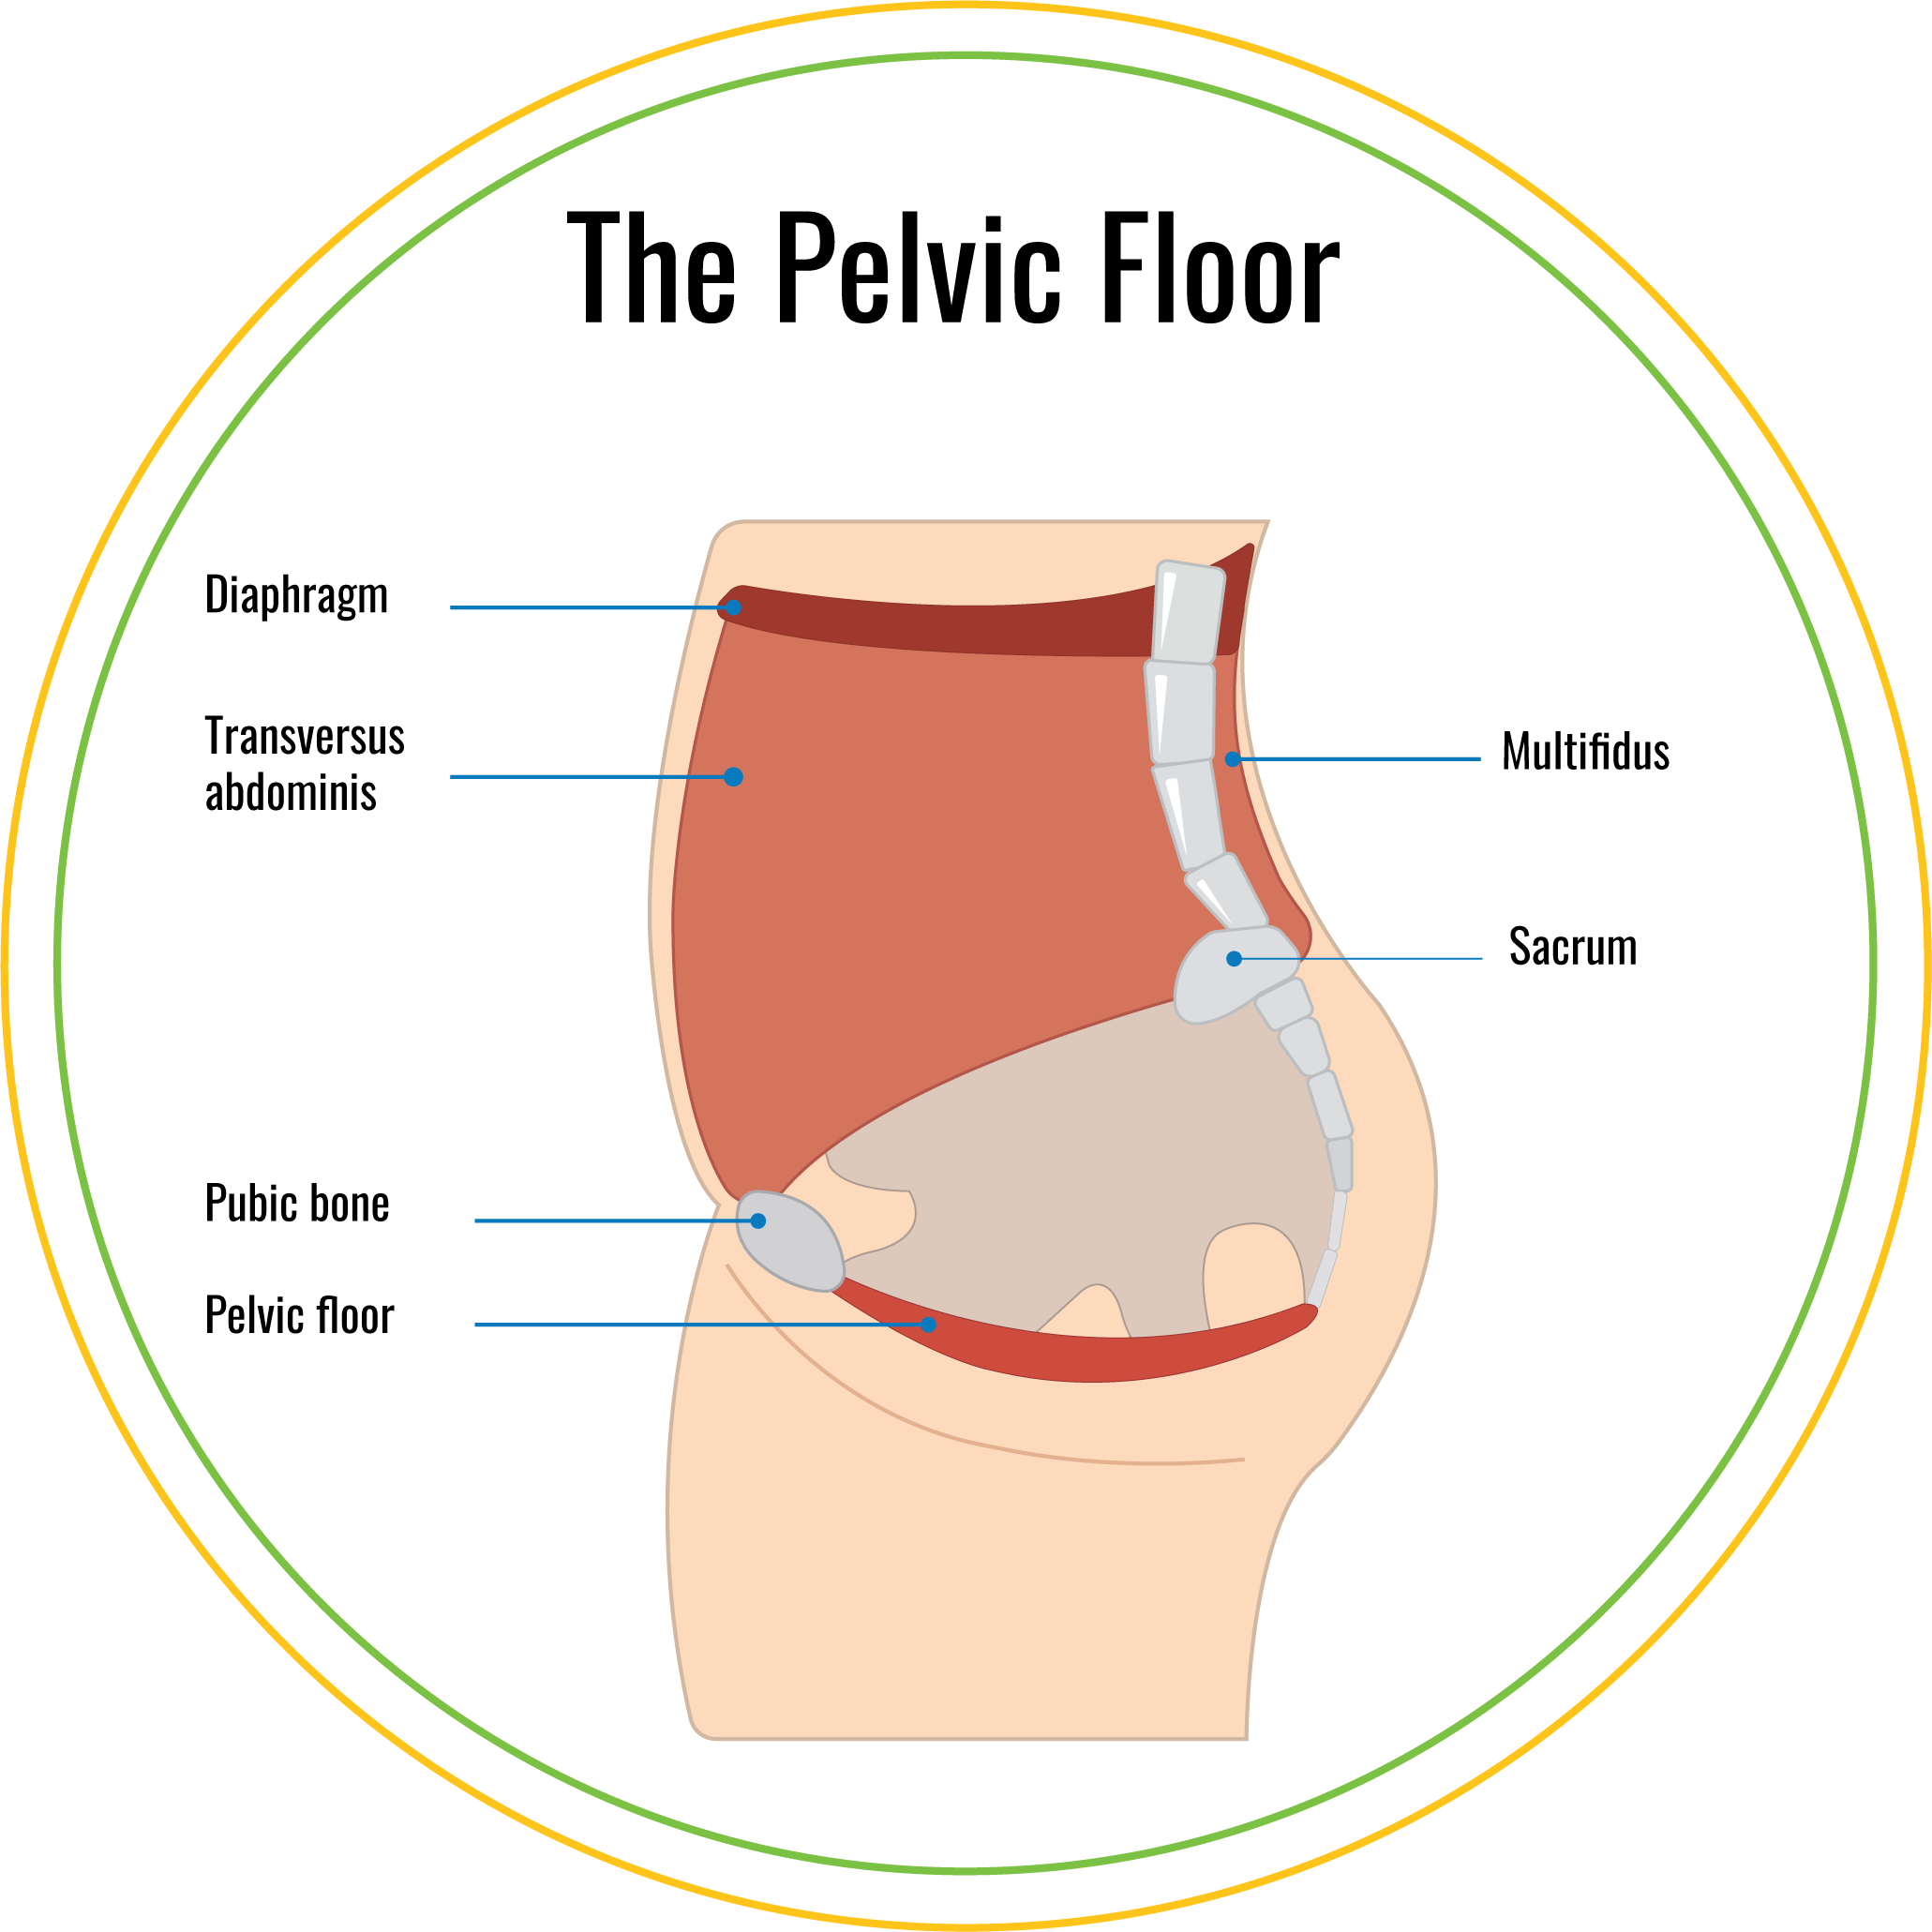
Carrying a baby during pregnancy naturally causes the pelvic floor to be weak because of the added weight and pressure. At birth, the pelvic floor is required to relax and lengthen to allow for delivery. This can make all of the muscles surrounding the pelvis extremely weak.
I believe that every woman should see a pelvic floor therapist postpartum to asses the degree of weakness and determine what exercises are necessary to strengthen the muscles. In fact, in Europe pelvic floor therapy is mandatory. I didn’t think I had any pelvic floor issues since I wasn’t peeing my pants when I sneezed or when I jumped or having pain with sex. However, my therapist did an internal exam and let me know that my deep pelvic floor muscles were extremely tight and weak and that I had a small case of diastasis recti. (Very common after giving birth). Since I was still nursing and had the relaxin hormone floating through my body, it made my muscles extremely stretchy and my pelvic floor was working over time to stabilize me during movements. My therapist helped me to close my diastasis recti, learn how to relax my pelvic floor muscles as well as strengthen them.
Depending on your insurance, pelvic floor therapy is 100% covered once you hit your insurance deductible from labor and delivery. 6 weeks postpartum is usually a good time to start pelvic floor therapy, however, you may be able to start it earlier according to your doctors recommendations. (Around two weeks postpartum I started to incorporate gentle strengthening such as hip lips and knee lifts off the ground while laying on my back). Learning how to breathe with the diaphragm will naturally help to relax and strengthen your pelvic floor. As you inhale to fill up, release pelvic floor muscles. As your exhale to empty out, squeeze pelvic floor in.
Here is a 4 week therapy plan to help strengthen and release your pelvic floor. Start slow, and continue to progress with more challenging exercises. For maintenance, it’s recommended to strengthen your pelvic floor about 3 times per week (just like any other muscle group). Kegals can easily be done everyday. My favorite time to do kegals is in the car or at night watching TV. (Just squeeze those pee muscles in and release). I find that just having awareness of your pelvic floor can naturally help to strengthen it. It just requires a little more concentration. You can slowly work in pelvic floor contraction into your everyday exercise or yoga routine as well.
Starting Exercises (Week 1 of Pelvic Floor Therapy)
Pelvic Floor Tilt
With knees bent, arch and round similar to a cat/cow pose. Arch with butt flat on the floor, and round pressing low back into the mat.
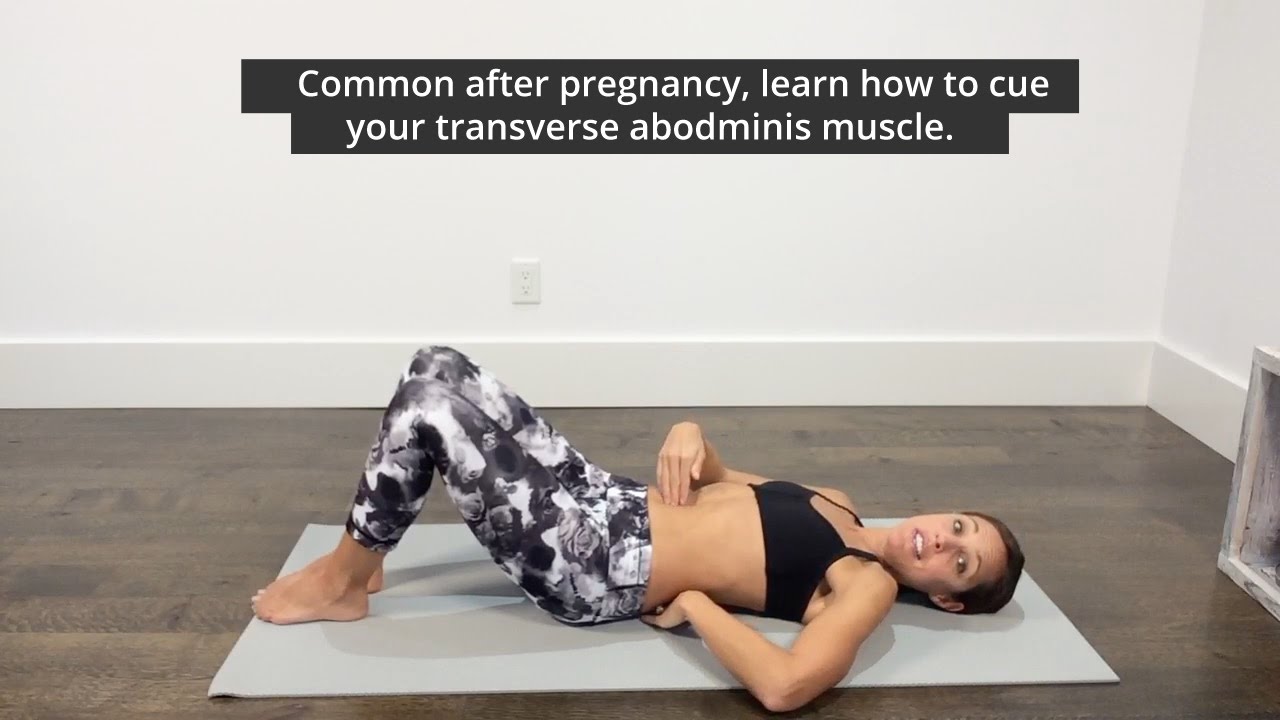
Supine Transverse Abdominis Bracing (Keep hands flat on the ground)
Press hands into the floor and tighten your abs, pulling your navel in towards your spine and up. Hold this position, then relax and repeat. Make sure to keep your back flat against the floor and do not hold your breath as you tighten your muscles.

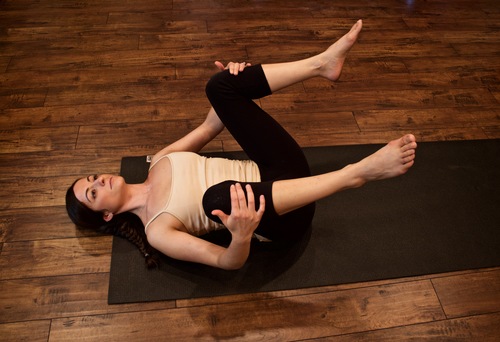
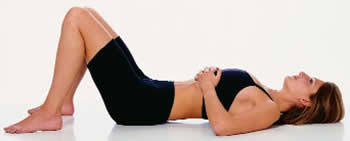
Supine Pelvic Floor Stretch (Hands on Knees)
Lift your legs off the ground with your knees bent and hold onto your knees. Let you legs fall outward, relaxing your pelvic floor muscles. Make sure to breathe evenly. You can also do happy baby pose, suptabadakanasana or malasana squat.
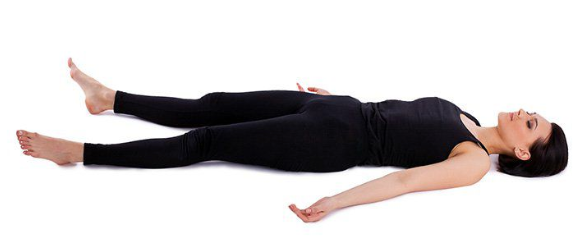
Supine Diaphragmatic Breathing with Pelvic Floor Lengthening
Breathe in deeply, allowing your belly to expand and your pelvic floor muscles to lengthen as you inhale. Exhale, bringing your belly and pelvic floor in.
Supine Pelvic Floor Contract and Release (Basic Kegals)
Contract your pelvic floor muscles and then relax and repeat. You can start to do longer holds as you get stronger. Make sure to allow enough time to let the pelvic floor muscles release after each contraction. You can also do this sitting.
Seated Isometric Hip Adduction with Pelvic Floor Contraction (Can do this lying down with knees bent as well)
Begin sitting upright with ball between your knees. Exhale, contract your pelvic floor muscles and squeeze the ball with your knees. 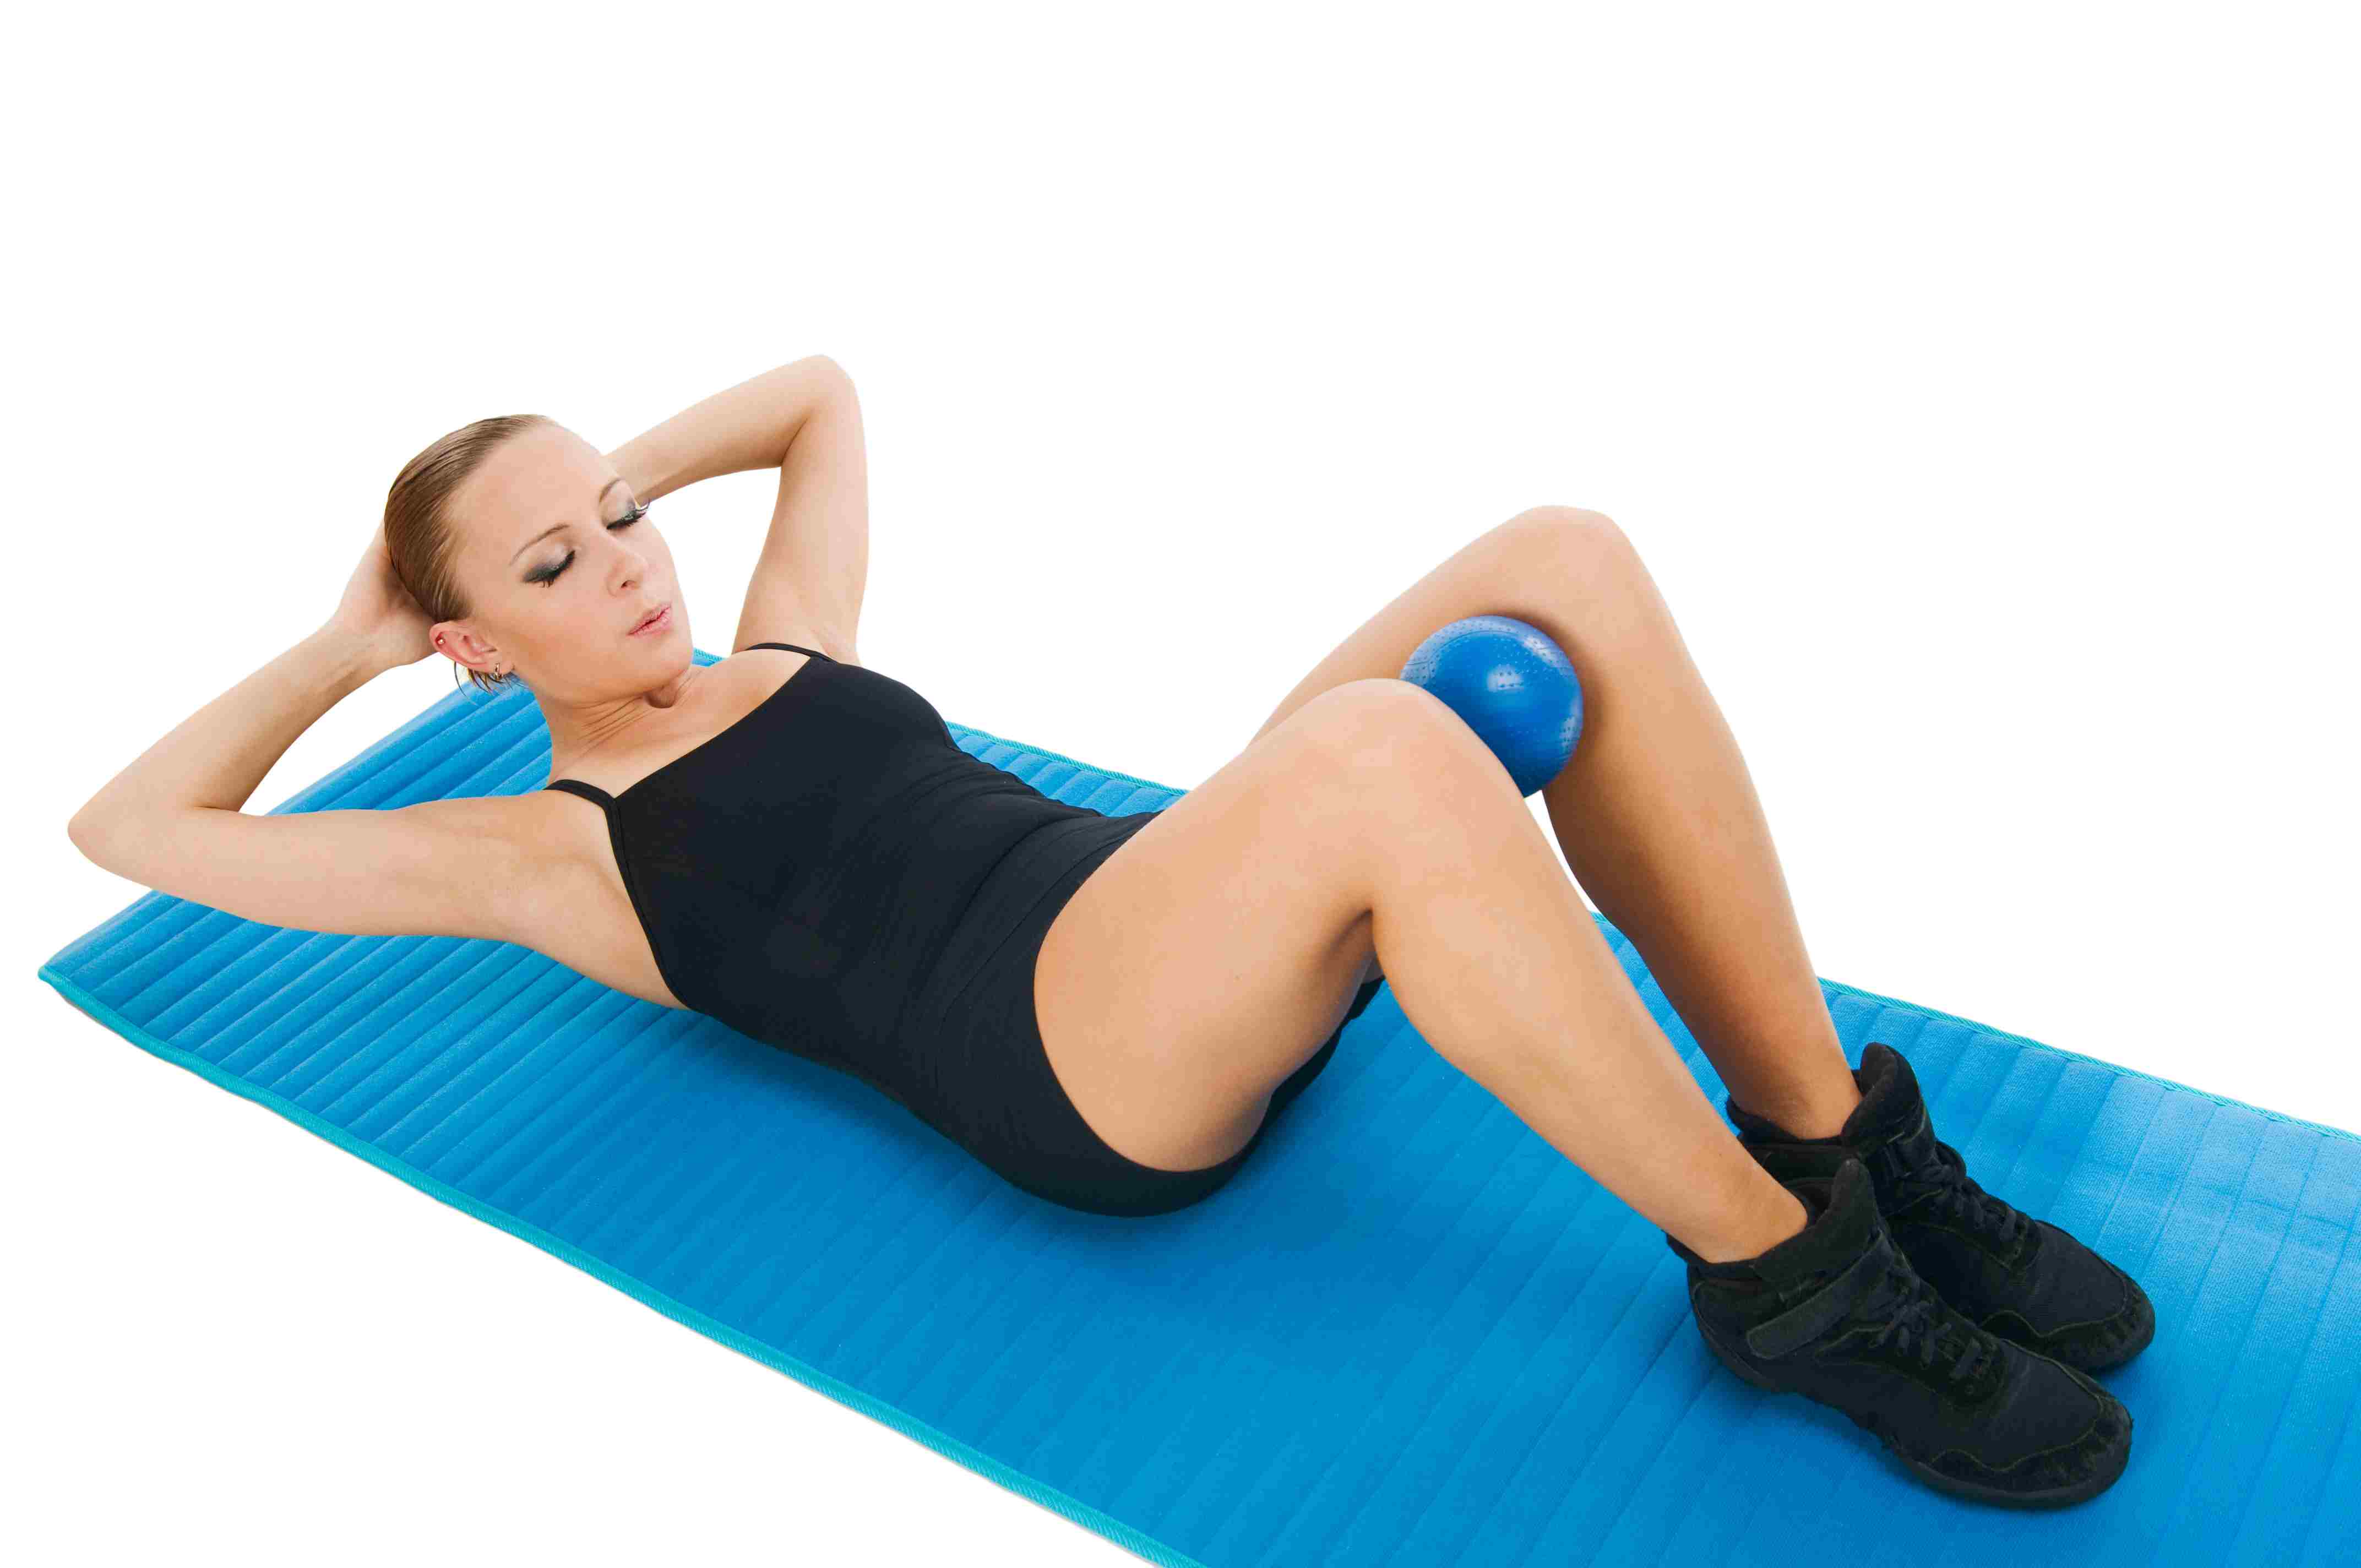
Week 2 Pelvic Floor Therapy
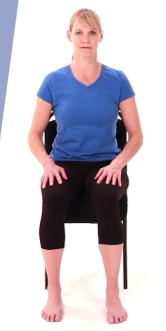
Seated Pelvic Floor Contraction (Kegals in Seated Position)
Exhale and contract pelvic floor muscles.
Supine Pelvic Floor Contract and Release (Basic Kegals with Diaphragmatic Breathing)
Contract your pelvic floor muscles and then relax and repeat. You can start to do longer holds as you get stronger (a count of 5-10 seconds is ideal). Make sure to allow enough time to let the pelvic floor muscles release after each contraction. You can also do this sitting.
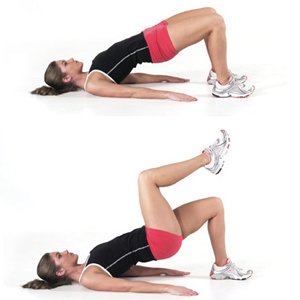
Supine Bridge with Pelvic Floor Contraction
Contract your pelvic floor muscles, then tighten your buttocks and lift your hips off the group to a bridge position. Make sure to continue breathing evenly and keep your pelvic floor muscles active. 
Supine March
Tighten your abdominals and slowly raise one of your legs off the floor, keeping your knee bent. Then return to the starting position and repeat with your other leg. Make sure to keep your trunk stiff during the exercise and do not let your low back arch. 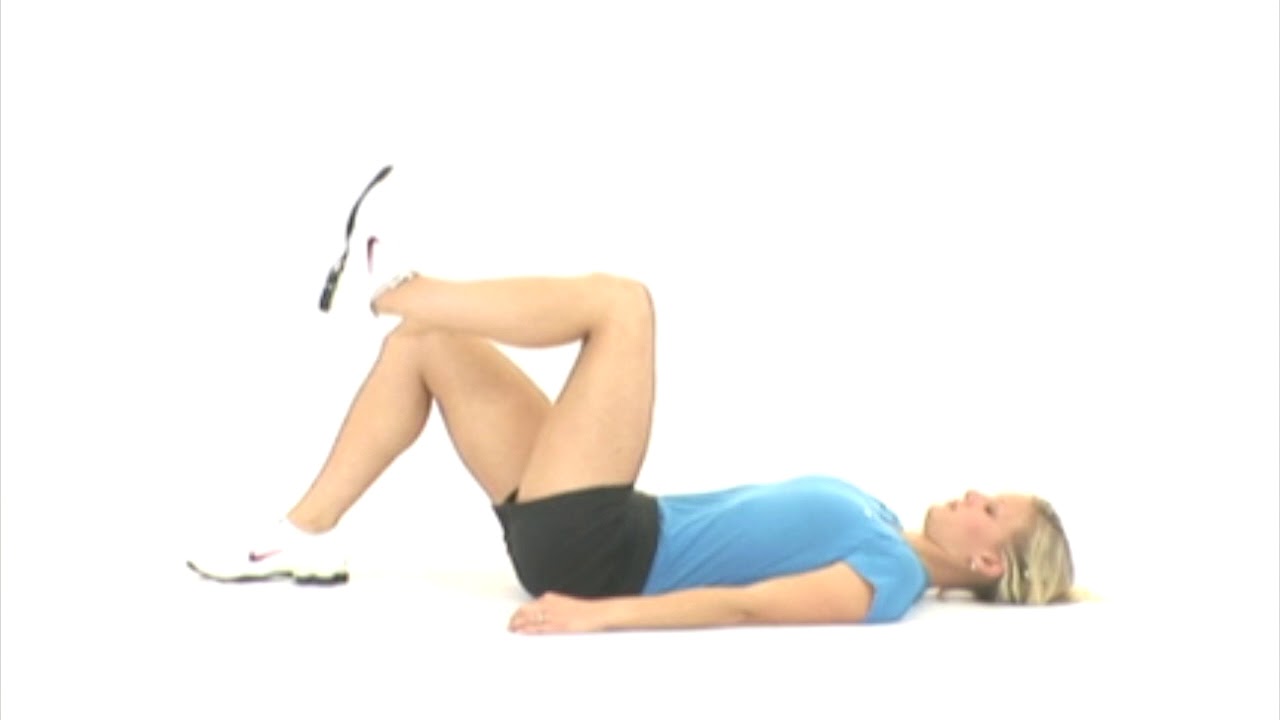
Transverse Abdominal Squeeze (To close diastasis recti)
With knees bent, suck in your transverse abdominals as if you were putting a pair of tight pants on. Continue to contract and release to strengthen. To progress, continue to squeeze in as you add a knee lift.
Week 3 Pelvic Floor Therapy
Seated Pelvic Floor Contraction (Kegals in Seated Position)
Exhale and contract pelvic floor muscles.
Supine Pelvic Floor Contract and Release (Basic Kegals)
Contract your pelvic floor muscles and then relax and repeat. You can start to do longer holds as you get stronger. Make sure to allow enough time to let the pelvic floor muscles release after each contraction. You can also do this sitting.
Supine Bridge with Knee Extension
Contract your pelvic floor muscles, then tighten your buttocks and lift your hips off the group to a bridge position. Keep your pelvis lifted and straighten one knee, then return that foot to the ground and repeat with your other leg. Make sure to keep your abdominals and pelvic muscles tight as you straighten each leg.
Supine March
Tighten your abdominals lift hips off the ground. Slowly raise one of your legs off the floor, keeping your knee bent. Then return to the starting position with hips lifted and repeat with your other leg. Make sure to keep your trunk stiff during the exercise and do not let your low back arch.
Advanced Version
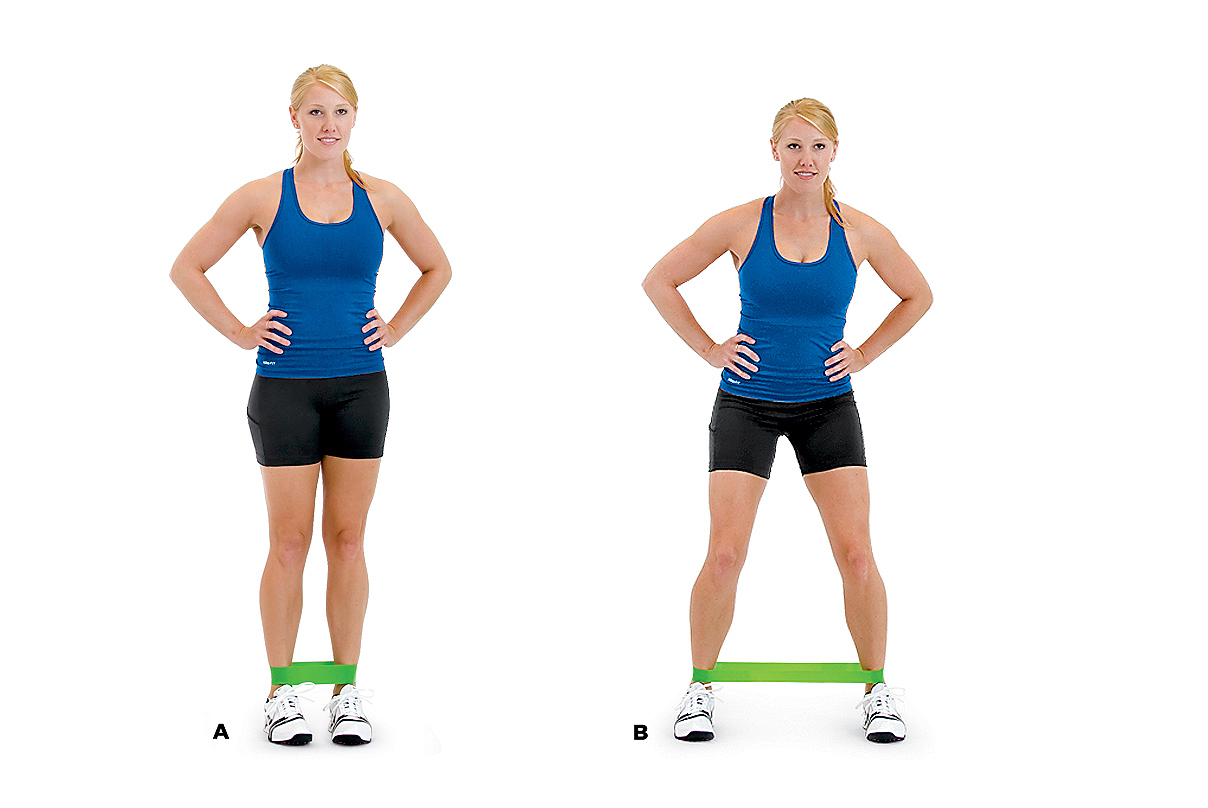
Sidestepping with Pelvic Floor Contraction
Loop resistance band around ankles. Contract your pelvic floor and deep abdominal muscles, then slowly step sideways keeping a slight bend in your knees. Make sure to keep your core and pelvic floor activated and continue to breathe evenly as you step sideways.
Week 4 Pelvic Floor Therapy
Bird Dog
Begin on all fours, with your arms positioned directly under your shoulders. Straighten one arm and your opposite leg at the same time, until they are parallel to the floor. Hold briefly, then return to the starting position. Make sure to keep your abdominals tight and hips level during the exercise. To progress, tuck knee into chest to squeeze in before extending out.
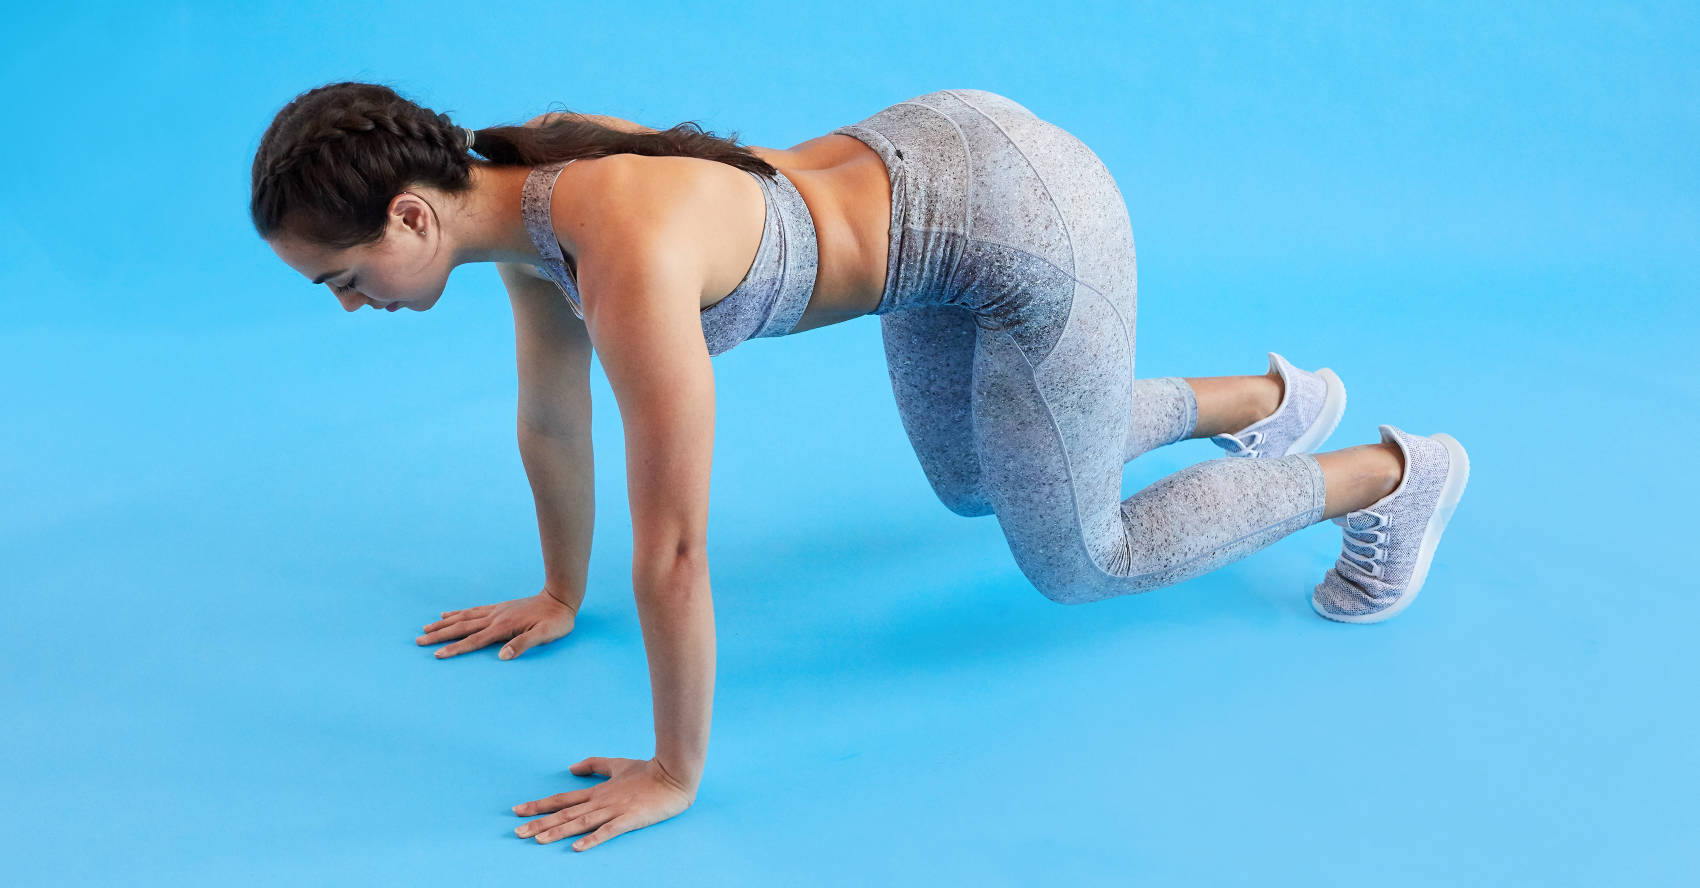
Modified Plank with Knee Lifts
Start in an all four positions with hands and feet on the floor. Squeeze in abs and pelvic floor and raise one knee off the ground at a time, holding for 5-10 seconds. You can also keep knees on the floor and raise one arm at a time, holding for 5-10 seconds.
Hip Adduction Clam Shells
Begin lying on your side with your knees bent. Lift your top knee up and lower back down. This is a great exercise to strengthen weak hips from child birth.

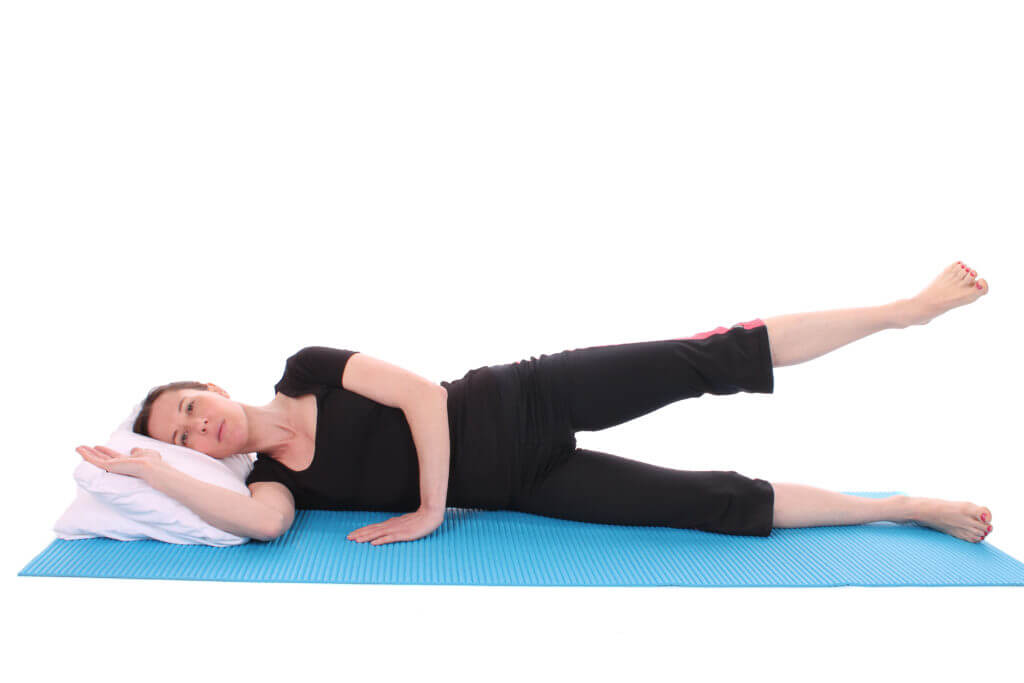
Side Lying Hip Adduction
Begin lying on your side with your top leg straight and your bottom leg bent. Lift your top leg up toward the ceiling and hold for a count of 10. Repeat for 3 sets and then slowly start to lower and raise leg in one fluid motion. Make sure to keep your leg straight and do not let your hips roll backward or forward during the exercise.
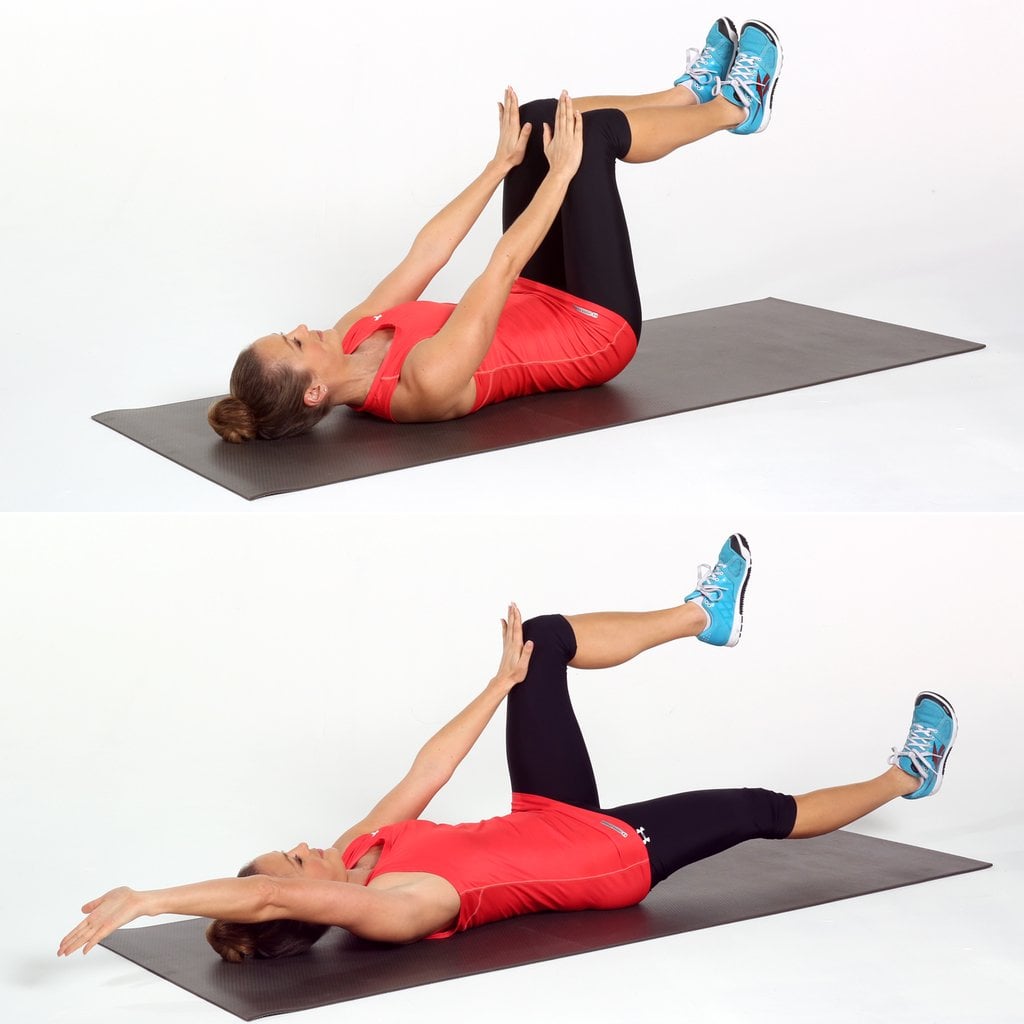
 Supine 90/90 Alternating Toe Touch
Lie on your back with your knees bent. Lift your legs off the ground to form a 90 degree angle. Slowly lower one leg, touching your toes to the floor, then return to the starting position and repeat with the opposite leg. Do not allow your low back to arch during the exercise. (If your back arches, this is a sign it may be too challenging).
To progress, you can start with knees bent with feet lifted to 90 degrees and extend each leg straight or you can do the dead bug exercise below. To make it more challenging, keep legs together and lower both legs to the floor at the same time, using transverse abdominis to pull your legs back up.
Bridge Lifts On Foam Roller
Place heels on the foam roll and lift hips up. Slowly rock heels forward and back to strengthen the pelvic floor, glutes and hamstrings.
Bridges with Arm Band Extension
Loop resistance band around pole and lay with your back and knees bent on mat. Pull arms overhead along your side while lifting hips up and squeeze glutes and pelvic floor. Release band overhead and lower hips down. Repeat. (Looping arms into your movements helps to strengthen more of the upper abs while leg movements tend to work more of the lower abs).

Pelvic Floor Release
Some women can feel a lot of tension in their pelvic floor from stress, or subconscious contracting during everyday activities (driving in a car, working out, sitting at a desk, etc). After labor and nursing, many women experience tightness in their pelvic floor. It’s important to be able to contract your pelvic floor muscles by exhaling to pull in just as it is to release the muscles by inhaling and drawing out.


